File -> NewProject -> Maven
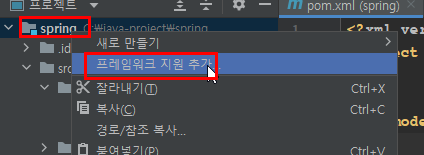
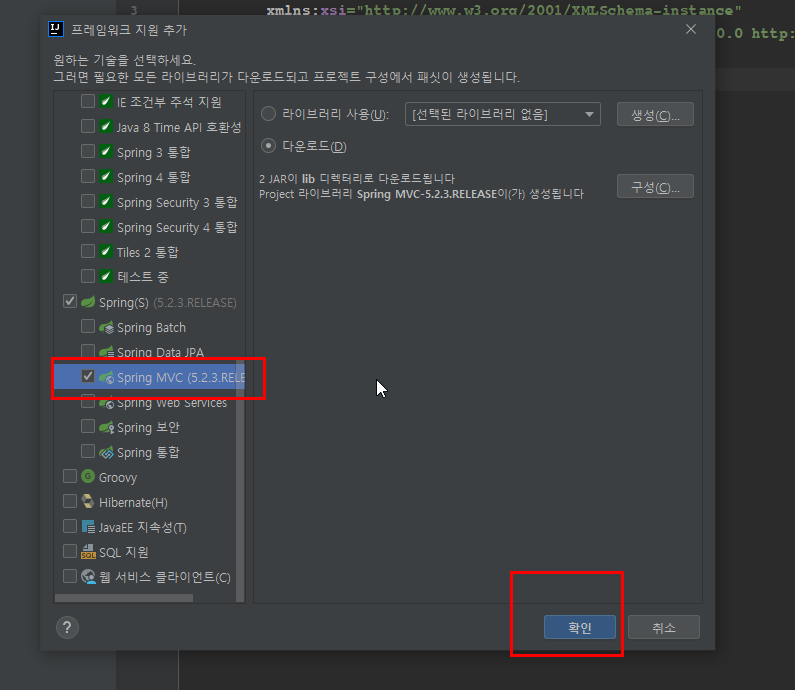
프로젝트 최상위 폴더를 마우스 우클릭하여 Add Framework Support 버튼을 눌러준다.
※ Web.xml 설정
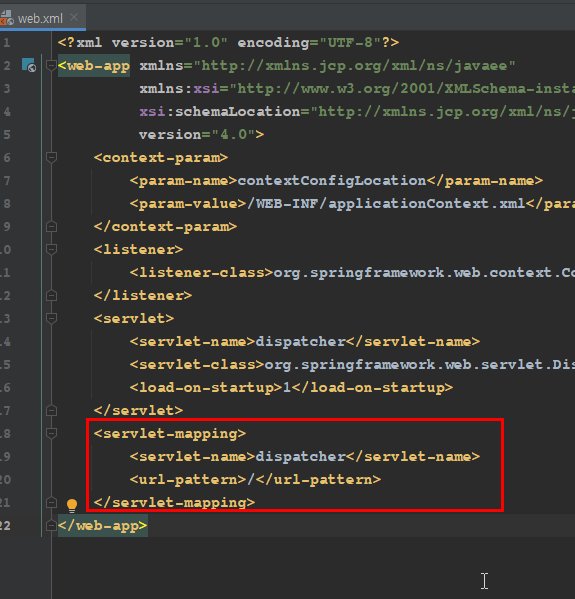
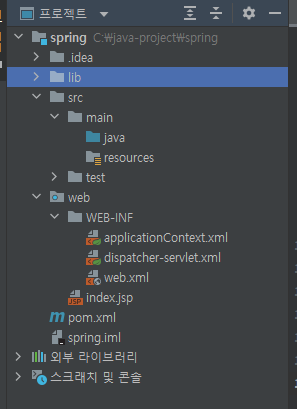
WEB-INF 폴더 내에 web.xml파일이 있다.
파일 내에서 <url-pattern>을 찾아서 *.from형태에서 /형태로 바꾸어준다.
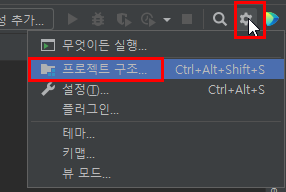
※ Project Structure
IntelliJ 우측 상단에 Project Structure 버튼 을 누른다.

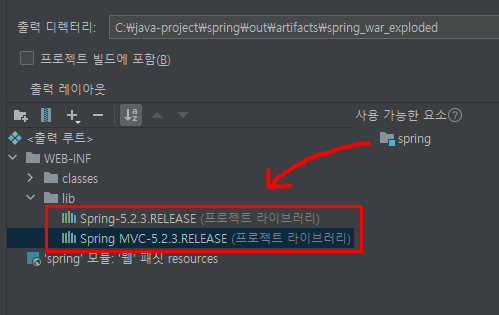
Artifacts 탭에 Available Elements 아래를 보면 폴더가 있다.
폴더를 더블클릭 해주면 여러개의 파일이 보이는데,
모두 더블클릭하여 왼쪽으로 옮겨주면 된다.
※ Dispatcher-servlet.xml
Dispatcher-servlet.xml 파일에 아래 코드를 붙여넣어준다.
<?xml version="1.0" encoding="UTF-8"?>
<beans xmlns="http://www.springframework.org/schema/beans"
       xmlns:xsi="http://www.w3.org/2001/XMLSchema-instance"
       xmlns:context="http://www.springframework.org/schema/context"
       xmlns:mvc="http://www.springframework.org/schema/mvc"
       xsi:schemaLocation="http://www.springframework.org/schema/beans http://www.springframework.org/schema/beans/spring-beans.xsd
        http://www.springframework.org/schema/context http://www.springframework.org/schema/context/spring-context-4.0.xsd
        http://www.springframework.org/schema/mvc http://www.springframework.org/schema/mvc/spring-mvc-4.0.xsd">

    <mvc:annotation-driven></mvc:annotation-driven> <!-- Annotation 활성화 -->
    <context:component-scan base-package="Controller"></context:component-scan> <!-- Component 패키지 지정 -->

    <bean class="org.springframework.web.servlet.view.InternalResourceViewResolver">
        <property name="prefix" value="/WEB-INF/views/"></property>
        <property name="suffix" value=".jsp"></property>
    </bean>

</beans>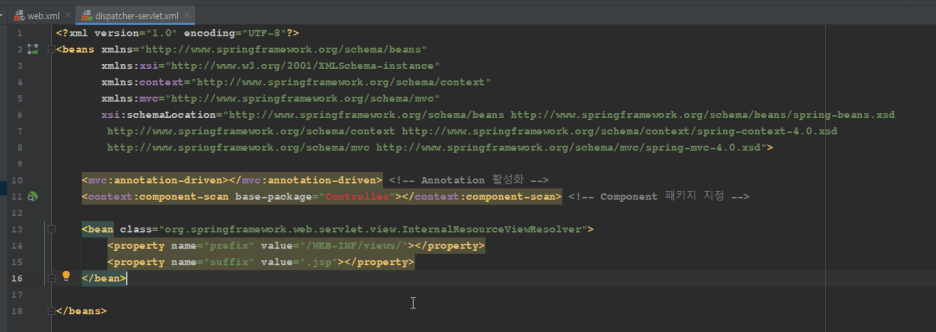
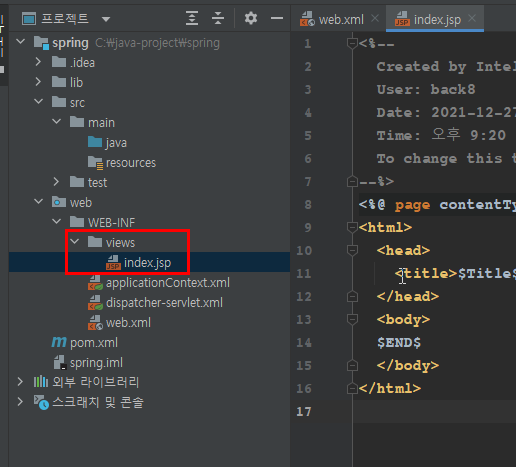
※ views 디렉토리 생성, 파일 옮기기
web - WEB-INF에 views 디렉토리를 생성하고,
index.jsp 파일을 views 디렉토리 안으로 옮긴다.
※ Controller 생성
src-main-java에 Controller패키지를 생성하고,
패키지 안에 controller 클래스를 생성하고 아래 소스 코드를 작성한다.
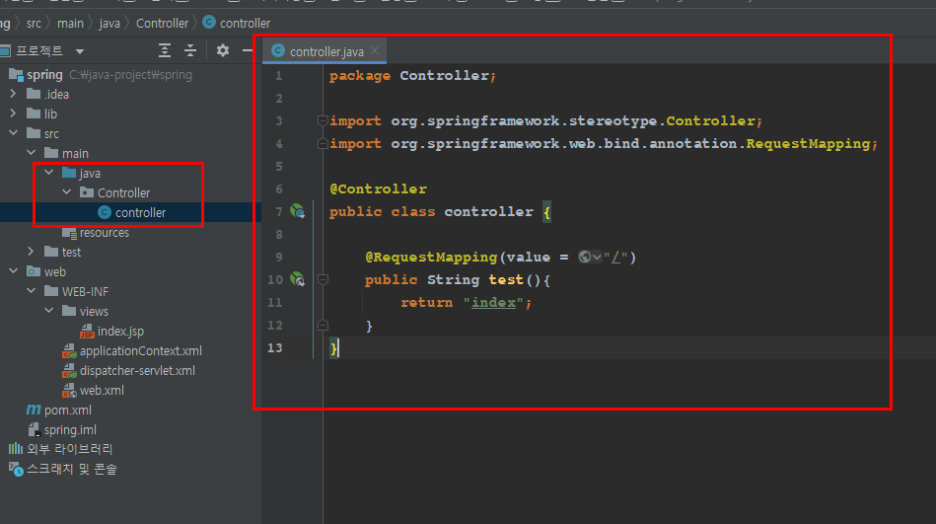
package Controller;
import org.springframework.stereotype.Controller;
import org.springframework.web.bind.annotation.RequestMapping;
@Controller
public class controller {
@RequestMapping(value = "/")
public String test(){
return "index";
}
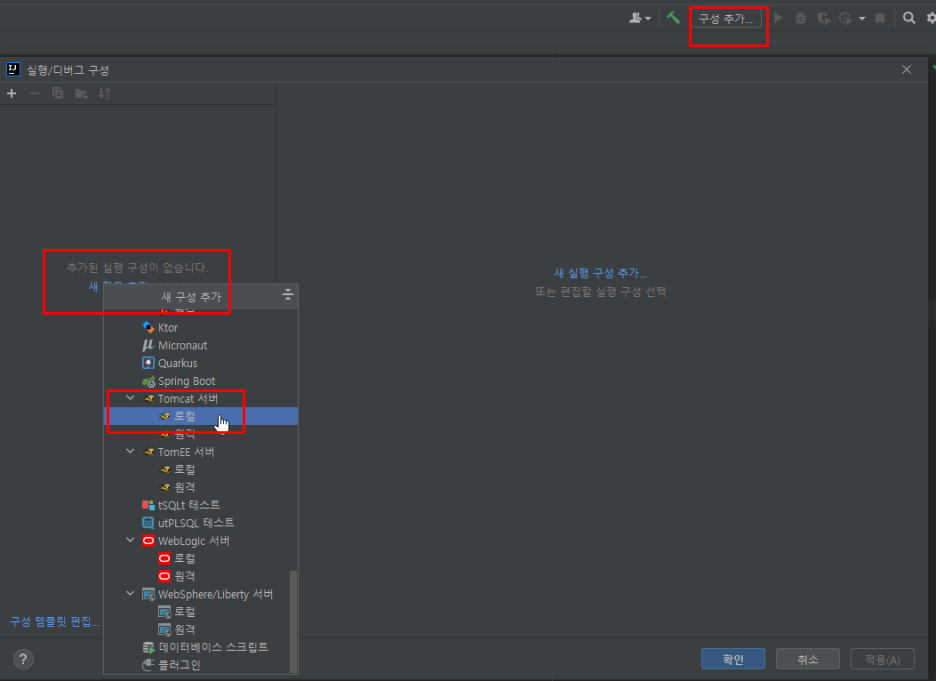
}※ Tomcat 추가
IntelliJ우측 상단 Add Configuration를 눌러준다.
좌측에 보이는 +버튼을 누르고 Tomcat server -> Local을 선택해준다.
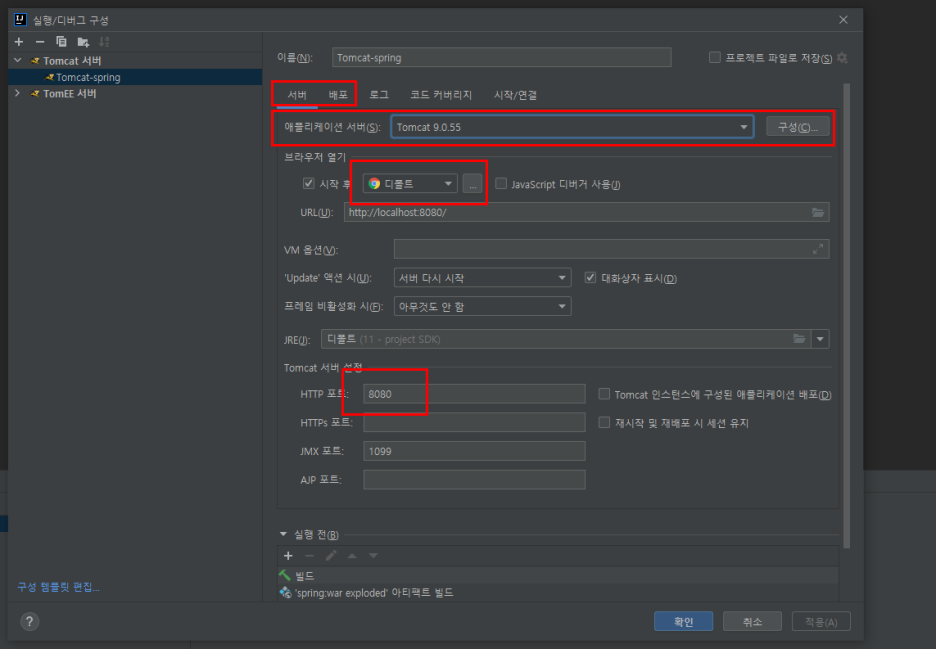
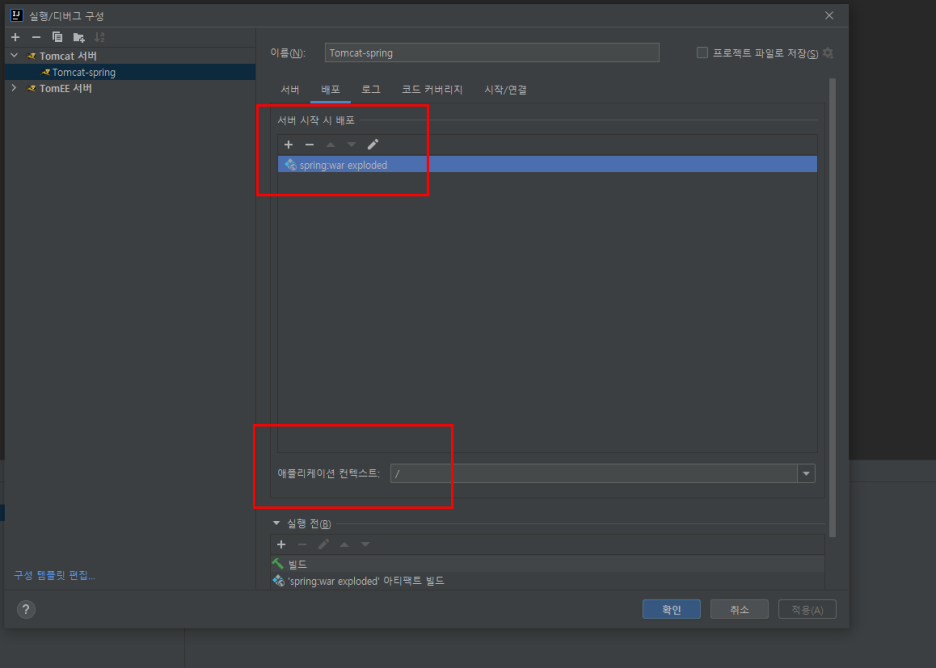
※ 배포 패키지 유형 참고
1) 아카이브(.war, .ear 등) 파일로 배포
- 아카이브는 WAS(Tomcat 등)에 의해 자동으로 압축이 해제된다.
- 파일이 많은 경우 압축을 푸는 시간이 오래 걸릴 수 있다.
- 원격 서버에 배포시 한 개의 파일만 전송하면 된다.
2) exploded(expanded)
- 아카이브를 압축 해제하여 디렉토리 형태로 배포
- 원본 소스를 건드리지 않고 그대로 배포하는 경우에 적합하다.
- 별도 디렉토리에 원본 소스를 복사하여 만들기 때문에 파일이 많은 경우
복사하는 시간이 오래 걸릴 수 있다.
- Application context를 기본 루트("/")로 변경 ( 최초에 만든 프로젝트 네임에 설정이 되어 있을 것이다. 이를 무시하고 실행한다면, http://localhost:8080/프로젝트명/index.jsp과 같은 경로로 접속해야 정상 접속이 가능하다. 이와 같은 기능을 하용할 경우에만 설정해주도록 하자.)